Contrary to the rush for jumps and weaves, elite agility performance isn’t built on obstacles; it’s engineered on the flat.
- True speed and safety come from a meticulously developed “proprioceptive blueprint,” teaching the dog body awareness before adding height or speed.
- Handler mechanics—your own movement and positioning—are the primary drivers of the dog’s path, making your flatwork as crucial as the dog’s.
Recommendation: Shift your focus from training obstacles to engineering movement. Invest 80% of your training time in foundational flatwork to build a physically and mentally sound canine athlete for a long, successful career.
Every new agility enthusiast has the same vision: their dog soaring effortlessly over a jump, weaving through poles with fluid grace, and blasting out of a tunnel. That moment of perfect synergy is the goal. But here’s the hard truth from a coach’s perspective: that vision is a trap. It makes you focus on the finish line while ignoring the starting blocks. The obsession with obstacles is the single biggest mistake that limits potential and, worse, leads to injury.
The common advice is to “start low” or “make it fun.” This isn’t wrong, but it’s dangerously incomplete. It still frames the obstacle as the centerpiece of training. True agility champions—the teams that are consistently fast, clean, and sound for years—are not built on the jump, the tunnel, or the weave poles. They are forged in the unglamorous, repetitive, and disciplined practice of flatwork. This is the science of movement, the engineering of an athlete’s body and mind before they are ever asked to perform at speed or height.
This approach isn’t about holding your dog back; it’s about building them up correctly. It’s about developing a deep, instinctual understanding of their own body—a proprioceptive blueprint—so that navigating an obstacle becomes an automatic physical response, not a frantic cognitive puzzle. It’s about programming the handler’s body language to be so clear and consistent that it becomes an invisible guidance system for the dog. The obstacles are not where the training happens; they are simply the final exam.
This guide will deconstruct that process. We will shift your focus from the equipment to the engine: the dog’s physical preparedness and the handler’s mechanical skill. We will explore why protecting a young dog’s body is paramount, how to build muscle memory correctly, and why your physical fitness is as important as your dog’s. It’s time to stop training for agility and start engineering an agility athlete.
This article provides a complete blueprint, covering everything from physical safety and training mechanics to the mental game and athletic conditioning. Explore the sections below to build your foundation like a professional.
Summary: Agility Foundation: Why Flatwork Matters More Than Obstacles?
- Jump Height Safety: Protecting Growth Plates in Dogs Under 18 Months
- The Muscle Memory of Weave Poles: 2×2 vs. Channel Method?
- The Handler’s Role: How Your Sprint Speed Affects the Dog’s Line?
- Start Line Stays: Building Impulse Control in High-Arousal Environments
- Walking the Course: How to Memorize 20 Obstacles in 5 Minutes?
- When to Increase Caloric Density for Working Dogs?
- How Much Water to Carry for a 50lb Dog on a 2-Hour Hike?
- How to Manage High-Energy Breeds in Apartments Under 600 Sq Ft?
Jump Height Safety: Protecting Growth Plates in Dogs Under 18 Months
Let’s get one thing straight: putting a puppy or young dog over jumps is non-negotiable malpractice. The desire to see your dog “get some air” is a direct path to long-term joint damage. A young dog’s bones contain soft areas at the ends called growth plates (epiphyseal plates), which are responsible for bone elongation. These plates are the last part of the skeleton to harden, and high-impact activities like jumping can fracture or permanently damage them, leading to deformities and a lifetime of arthritis. The timeline for closure varies, with growth plates in large breeds closing as late as 14-16 months.
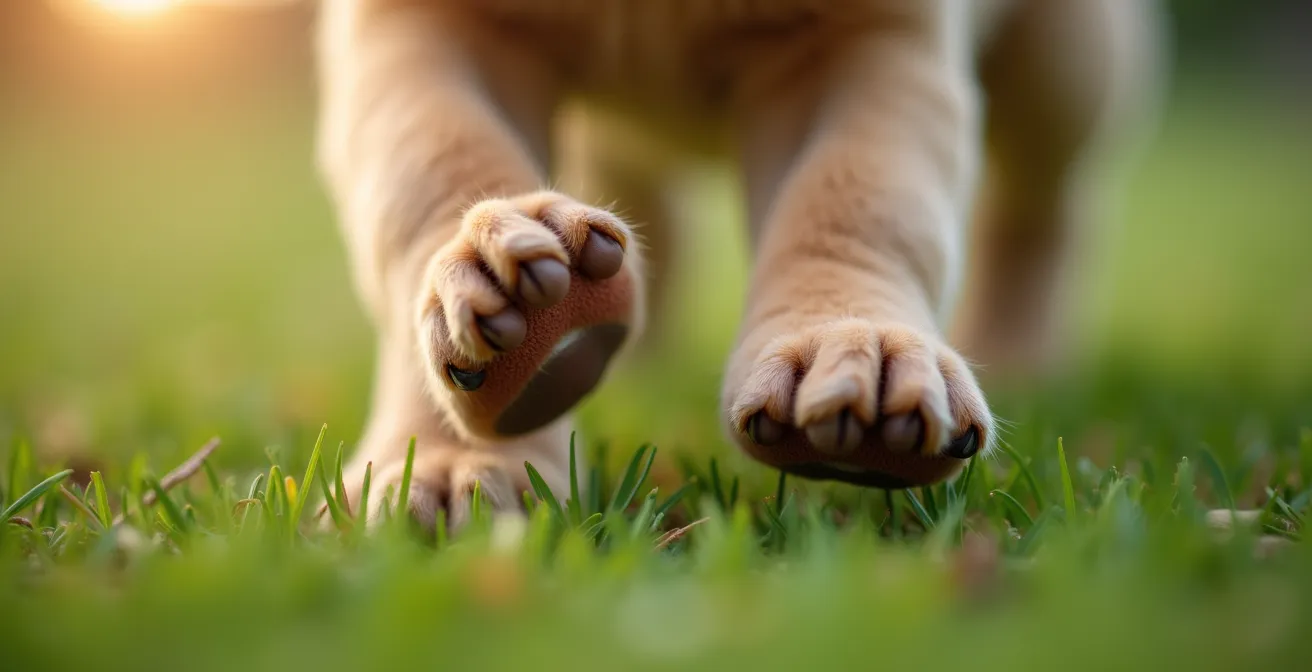
The foundation for jumping has nothing to do with height. It is about teaching the dog to be aware of its body, how to approach an object, and how to collect its stride for takeoff and landing. This is all done on the flat. Your focus should be on building a robust proprioceptive blueprint—the dog’s internal map of its own body in space. This is done with exercises that build strength, balance, and coordination without impact.
Cavaletti work, with poles laid flat on the ground, is the gold standard. It forces the dog to think about its foot placement, engage its core, and learn to lift its feet. This is the bedrock of jumping skill. You are not teaching the dog to clear a bar; you are teaching it how to control its kinetic chain from nose to tail.
As you can see, this exercise is about precision, not power. Each step is a mental and physical calculation. Backward walking, balance discs, and controlled deceleration drills all contribute to this foundation without ever putting a single pound of concussive force on vulnerable joints. The jump is the reward for mastering the groundwork, not the tool for learning it.
Action Plan: Safe Foundation for Young Dogs
- Master Ground Poles: Practice cavaletti work with poles lying flat on the ground to teach foot placement and proprioception.
- Build Rear-End Awareness: Teach your dog to walk backward in a straight line to engage its posterior chain and core without impact.
- Develop Core Strength: Use balance cushions or discs for short, supervised sessions to improve core stability and body awareness.
- Control Repetitions: Limit any single exercise to just 5-6 repetitions per session to prevent mental and physical fatigue.
- Train the Brakes: Focus on drills that teach controlled deceleration and the ability to “stop on a dime,” which is crucial for safety and tight turns later.
The Muscle Memory of Weave Poles: 2×2 vs. Channel Method?
Weave poles are a masterclass in canine biomechanics and muscle memory. How you teach them determines whether you build an independent, problem-solving partner or a dog that is visually dependent and prone to frustration. The two dominant methods, channel weaves and the 2×2 (Two-by-Two) method, create fundamentally different learning experiences and long-term skills. As a coach, I am an unapologetic advocate for the 2×2 method because it prioritizes cognitive understanding over rote momentum.
The channel method, where poles are set up in a wide, open channel that is gradually closed, can produce fast results. However, it often teaches the dog to simply run straight through a visual guide. When the channel disappears, the dog may become confused, lose confidence, or develop a “flat” weaving style that lacks the proper spinal flexion and collection needed for speed and safety. It creates a dependency on a visual picture that won’t exist in a trial.
The 2×2 method, by contrast, starts with just two poles. From day one, it teaches the dog the most critical part of weaving: finding the correct entry. By presenting these two poles at various angles and in different locations, you are not teaching a path; you are teaching a concept. The dog learns to independently identify the entry between the first two poles, collect its body, and initiate the weaving motion. This method inherently builds better problem-solving skills and encourages the natural, rhythmic spinal flexion required for top-level performance. It takes longer and requires more handler precision, but it builds a skill that is bombproof under pressure.
The following table, based on concepts highlighted in an analysis of different weave training methods, breaks down the biomechanical and cognitive differences.
| Aspect | 2×2 Method | Channel Method |
|---|---|---|
| Spinal Flexion | Natural collection encouraged | Can promote flatter style if rushed |
| Entry Independence | Builds from day one | May create visual dependency |
| Exit Precision | Taught progressively | Maintained through momentum |
| Error Recovery | Better problem-solving | May cause confusion when guides removed |
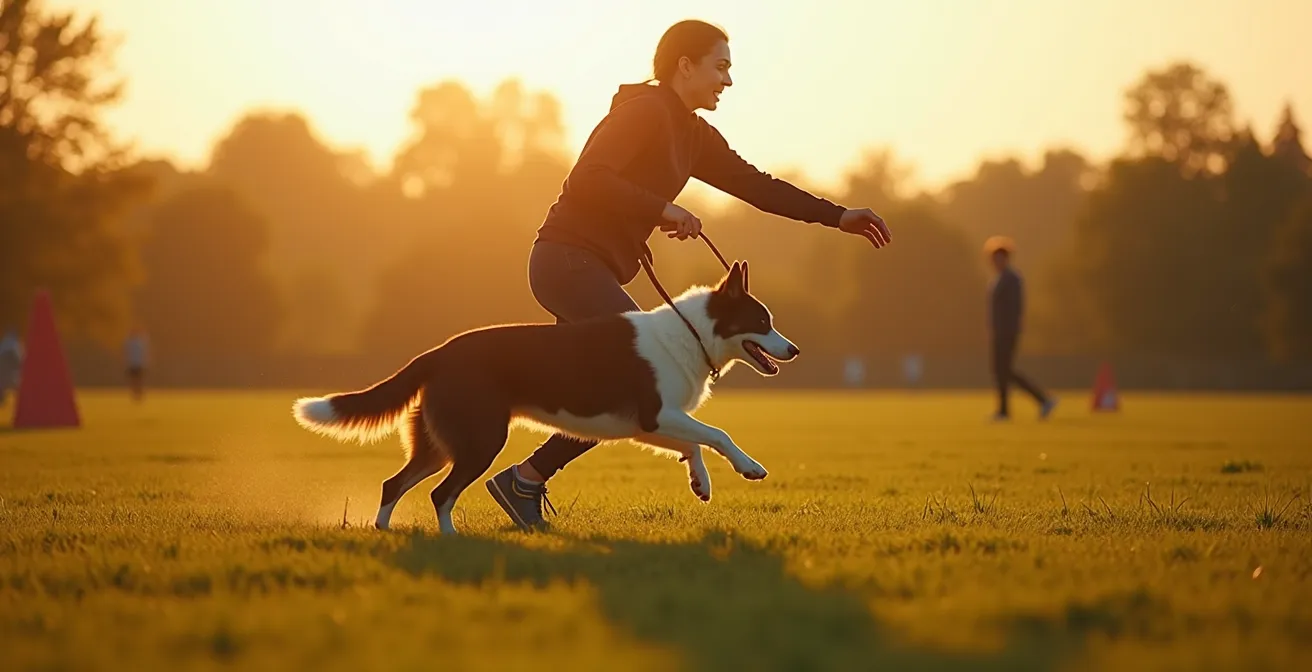
The Handler’s Role: How Your Sprint Speed Affects the Dog’s Line?
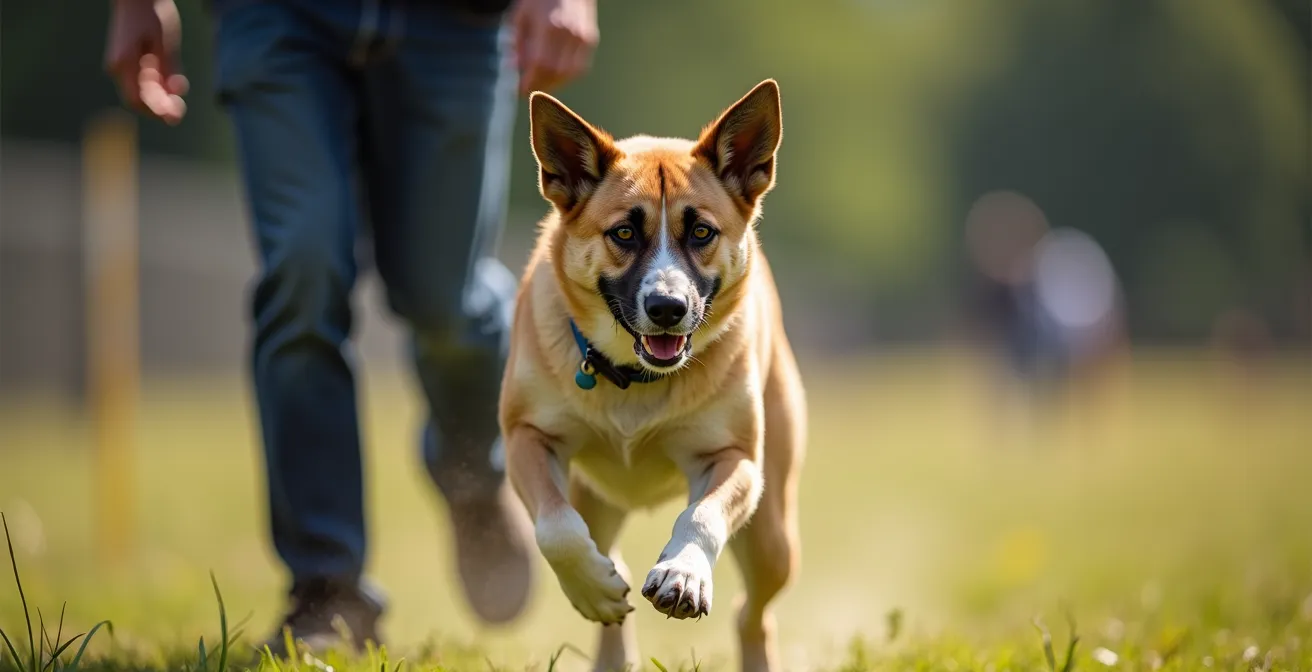
Beginners focus on the dog’s speed. Professionals focus on the handler’s mechanics. Your dog is a high-performance vehicle, but you are the driver. Your speed, your path, your deceleration, and your body language dictate the dog’s line on the course. A handler who runs flat-out without control will consistently pull their dog past turns, create wide, inefficient lines, and increase the risk of a crash. A smooth, controlled handler who understands timing and position will create a faster and tighter run than a pure sprinter every single time.
Your goal is not maximum speed; it is consistent and predictable movement. The dog needs to be able to read your cues—your shoulder and hip position, your rate of acceleration, and your deceleration—from a distance and trust what they mean. If you are constantly making sudden stops or erratic changes in speed, you create a hesitant and anxious dog. Your flatwork as a handler is just as, if not more, important than your dog’s. You must practice running at different speeds while maintaining clear body cues. Can you signal a turn while accelerating? Can you decelerate smoothly into a collection cue for a tight wrap?
Think of your shoulders and hips as laser pointers. They should always be pointed where you intend the dog to go next. Another key concept is “negative space.” By positioning yourself away from the direct path, you open up the dog’s line of sight to the next obstacle, allowing them to commit earlier and with more confidence. Your job is not to race your dog to the obstacle; it’s to get to the position that best helps your dog execute the sequence efficiently. As legendary trainer Barb Levenson states in her work on foundational training:
Flatwork is your agility foundation, teaching you how to handle and how to make all your body language clear, consistent, coherent, and timely.
– Barb Levenson, Flatwork: Foundation for Agility
This principle is absolute. Your journey to becoming a top agility team starts with mastering your own movement. Your dog is already a phenomenal athlete; you must train to become their professional-level navigator.
Start Line Stays: Building Impulse Control in High-Arousal Environments
The start line is not just a waiting game; it’s the ignition sequence for the entire run. This is where the mental foundation of your partnership is tested under extreme pressure. For a high-drive dog, the environment is electric: other dogs are running, people are cheering, and the handler’s adrenaline is pumping. Without a rock-solid start line routine, this arousal becomes anxiety and uncontrolled explosion. With one, it becomes arousal-as-fuel—channeled, controlled power.
The common mistake is teaching a simple “stay,” which often results in a tense, anxious “holding” position. The dog is physically trembling, locked in a battle of self-control that drains mental energy before the run even begins. The professional approach is to build a “loaded” position. This is an active, athletic stance where the dog’s weight is shifted to its rear, its core is engaged, and its body is coiled like a spring, ready to launch forward with power and purpose. This isn’t a command the dog is forced to obey; it’s a trained behavior that focuses its drive.
Look at the difference. This dog is not passively waiting; it is actively engaged and prepared for launch. Building this requires breaking the behavior down into tiny pieces: rewarding the weight shift, rewarding eye contact, rewarding the muscle tension in the rear. It’s a process of movement engineering that transforms a dog’s manic energy into focused, explosive power. You gradually “proof” this behavior against distractions, adding more elements of a trial environment over time so that the dog learns that the start line routine is their moment of zen-like focus before the storm.
Impulse control is not about suppressing a dog’s drive; it’s about giving that drive a job. The loaded start line gives the dog’s brain a clear task: “hold this powerful position until the release cue.” This prevents the cognitive overload of taking in all the environmental chaos and allows them to start the course with a clear head and a powerful, efficient stride.
Walking the Course: How to Memorize 20 Obstacles in 5 Minutes?
Your five-to-eight-minute course walk is the most critical strategic planning session you have. This is where the run is won or lost. Many beginners make the mistake of trying to memorize the dog’s path, focusing on each obstacle number in sequence. This is inefficient and clutters your brain. Your focus should be on memorizing one thing and one thing only: your path. The dog’s path is a direct consequence of a well-executed handler path.
The most effective technique for memorization under pressure is “chunking.” A 20-obstacle course is overwhelming. But six or seven mini-sequences of three obstacles is manageable. You walk the course and break it down into logical “chunks.” For example, Jump-Tunnel-Jump is one chunk. Weave Poles-Tire-A-Frame is another. You don’t memorize “Obstacle 1, Obstacle 2, Obstacle 3.” You memorize the handling maneuver required to get from 1 to 2, and from 2 to 3. Is it a front cross? A rear cross? A blind cross?
Your memorization process should follow a clear plan:
- Divide and Conquer: Walk the path and break the entire course into 6-7 logical “chunks” of 3-4 obstacles each.
- Focus on Your Feet: Walk each chunk focusing only on your path, your cues, and your handling maneuvers. Where do you need to be to give your dog the clearest possible line to the next obstacle?
- Mind the Gaps: Pay extra attention to the transitions *between* chunks. This is where most errors happen, as the handler’s focus shifts from one sequence to the next.
- Mental Rehearsal: After walking the path physically, stand in one place, close your eyes, and run the course in your head. Visualize your movements, your cues, and your dog’s perfect response.
By focusing on your own choreography, you free up mental bandwidth. You trust that if you execute your plan, your well-trained dog will read your body language and take the correct obstacles. You are the navigator; your job is to know the map intimately so you can guide your athletic partner through it at speed.
When to Increase Caloric Density for Working Dogs?
A canine athlete’s body is an engine, and food is its fuel. Just as you wouldn’t run a race car on regular gasoline, you can’t expect peak agility performance from a dog on a maintenance-level diet. However, simply dumping more food into the bowl is a clumsy and often counterproductive approach. The key is to strategically increase caloric density—the number of calories per gram of food—to match periods of intense workload, especially during foundational training when the dog is building significant muscle mass.
Monitoring your dog’s body condition score is critical. You should be able to easily feel the ribs under a thin layer of fat, and there should be a visible waistline. During periods of increased training (e.g., introducing weave pole drills or sprint work), you need to provide the building blocks for muscle repair and growth. This means not just more calories, but the right kind of calories at the right time. A diet with a higher percentage of fat and protein will provide more concentrated energy than one high in fillers.
Timing is also a crucial component of athletic nutrition. The period immediately following intense exercise is a critical window for recovery. Sports medicine research on canine muscle recovery indicates a 30-60 minute window post-exercise for optimal glycogen replenishment. Glycogen is the primary fuel source stored in muscles. Providing a small, easily digestible, high-carbohydrate snack within this window can dramatically speed up muscle recovery and prepare the dog’s body for the next training session. This could be a specialized supplement or even a small amount of cooked sweet potato. This strategic “refueling” is what separates a well-managed athlete from a dog that is constantly running on empty.
How Much Water to Carry for a 50lb Dog on a 2-Hour Hike?
While hiking seems different from agility, the principle of athletic management is identical. Hydration isn’t just about preventing heatstroke; it’s a performance-critical factor. Even mild dehydration has a massive impact on a dog’s physical and cognitive abilities. In fact, veterinary sports medicine research demonstrates that as little as 2% dehydration significantly impairs coordination and cognitive function. For an agility dog, that impairment translates to a dropped bar, a missed weave entry, or a slow response to a handling cue. On a hike, it can lead to stumbling and injury.
Forget generic formulas like “X ounces per pound.” The correct amount of water depends on temperature, humidity, intensity, and the individual dog. The professional approach is to learn how to assess hydration in the field and to practice proactive hydration management. Two simple field tests are essential:
- Gum Tackiness: Gently lift your dog’s lip. The gums should be slick and slimy. If they feel tacky or sticky, your dog is already dehydrated.
- Capillary Refill Time (CRT): Gently press a finger on the gums until they turn white. Release and count how long it takes for the pink color to return. It should be less than two seconds. A longer time indicates poor hydration.
The most effective strategy is pre-hydration. Encouraging your dog to drink well *before* the activity begins creates a hydration buffer. Many high-drive dogs are too excited to drink during an activity, so ensuring they are fully hydrated beforehand is key. For a 50lb dog on a 2-hour moderate hike, you should carry a minimum of 2 liters (about 67 oz) of water, but be prepared to offer it frequently and check their hydration status rather than relying on a fixed schedule. Adding a splash of bone broth to the water before the hike can make it more palatable and encourage a full drink.
Key Takeaways
- Foundation First: True agility skill is built on the flat with proprioception and body awareness exercises, not on obstacles. Protect your young dog’s joints at all costs.
- Handler is the Navigator: Your path, speed, and body language dictate the dog’s line. Master your own mechanics before demanding perfection from your dog.
- Engineer the Athlete: Treat your dog like a professional athlete. This includes strategic nutrition, proactive hydration, and building mental skills like impulse control, not just physical ones.
How to Manage High-Energy Breeds in Apartments Under 600 Sq Ft?
This is the ultimate test of the flatwork philosophy. If you believe agility is about having access to a full field of equipment, living in a small apartment with a high-energy breed seems impossible. But if you understand that agility is about body awareness, impulse control, and handler connection, then your 600-square-foot apartment becomes your greatest training asset. It forces you to focus on what truly matters.
You can build a world-class agility foundation without a single piece of regulation equipment. Your goal is to provide physical and mental outlets that build the core skills required on the course. Mental fatigue can be just as effective as physical fatigue for a high-energy dog. Scent work, for example, is an incredibly draining activity that can be done with a few hidden treats around the apartment. It teaches focus, problem-solving, and independence.
Your living space is a ready-made gym for proprioceptive work. A narrow hallway is the perfect place to practice backing up in a straight line, which is a phenomenal exercise for building rear-end awareness. Couch cushions can be arranged on the floor to create unstable surfaces, forcing your dog to engage its core and stabilizer muscles to maintain balance. You can teach pivot exercises in a small space, teaching the dog to shift its weight and control its body around a fixed point. These are the exact skills needed for tight turns and collection on course.
The most important skill you can train in a small space is calmness. Protocols for “capturing calmness”—rewarding the dog for voluntarily choosing to settle down—are foundational. This builds the “off switch” that is so critical for managing arousal at a chaotic trial. By focusing on these indoor exercises, you are not just “managing” your high-energy dog; you are meticulously building the mind and body of a future agility champion, proving that the foundation of this sport is a state of mind, not a location.
By shifting your perspective from the finish line to the foundation, you are not delaying your agility career; you are investing in its longevity and success. Start engineering your athlete today, and the obstacles will become the easy part.