Being denied boarding because of an IATA-non-compliant pet crate is a common, costly, and entirely preventable regulatory failure.
- Compliance is not subjective; it is a strict checklist of non-negotiable standards for hardware, dimensions, and labeling.
- Minor details like plastic fasteners, incorrect sticker placement, or insufficient headroom are grounds for immediate rejection.
Recommendation: Conduct a thorough self-audit of your pet’s travel container against official IATA standards at least one week prior to your flight to identify and rectify any points of failure.
The scene is a familiar and frustrating one at airport check-in counters worldwide: a traveler, ready for their journey, is abruptly informed that their pet cannot fly. The reason is not the animal’s health or documentation, but the carrier itself. The crate you believed was perfectly safe and comfortable has been deemed a regulatory failure. Often, the issue comes down to seemingly minor details—the use of plastic nuts instead of metal bolts, ventilation openings that are incorrectly sized, or labels that are improperly placed.
Many travelers assume that a crate marketed as “airline-approved” is automatically compliant. This is a dangerous assumption. The final authority is the airline agent at the counter, armed with a checklist derived from the International Air Transport Association (IATA) Live Animals Regulations (LAR). These regulations are not guidelines; they are strict, non-negotiable standards designed to ensure the safety and welfare of the animal, the crew, and the integrity of the aircraft and its cargo.
But what if the key to avoiding rejection was not simply buying a better crate, but understanding the specific logic behind an auditor’s inspection? This guide moves beyond generic advice and deconstructs the critical compliance checkpoints that most frequently result in denial. We will examine the precise, unforgiving details—from fastener materials to acclimation protocols—that separate an accepted carrier from one that grounds your travel plans.
This article provides an auditor’s perspective on the most critical IATA regulations. The following sections break down each compliance checkpoint, revealing the details that determine whether your pet’s carrier is accepted or rejected at the check-in counter.
Summary: IATA Compliance: The Ventilation Details That Get Carriers Rejected
- The “Ears to Roof” Rule: Measuring Your Dog for Flight Clearance
- Metal vs. Plastic Fasteners: Why Airlines Demand Metal Nuts?
- Acclimation Timeline: How to Prep a Dog for 8 Hours in a Crate?
- Freezable Water Dishes: Preventing Spills During Turbulence
- Live Animal Stickers: Where to Place Them for Maximum Visibility?
- ISO 11784/11785: What If Your Microchip Isn’t Compatible in Europe?
- How to Break the Cycle of Nighttime Accidents in Crate Training?
- Pet Passport vs. Health Certificate: What Is the Difference?
The “Ears to Roof” Rule: Measuring Your Dog for Flight Clearance
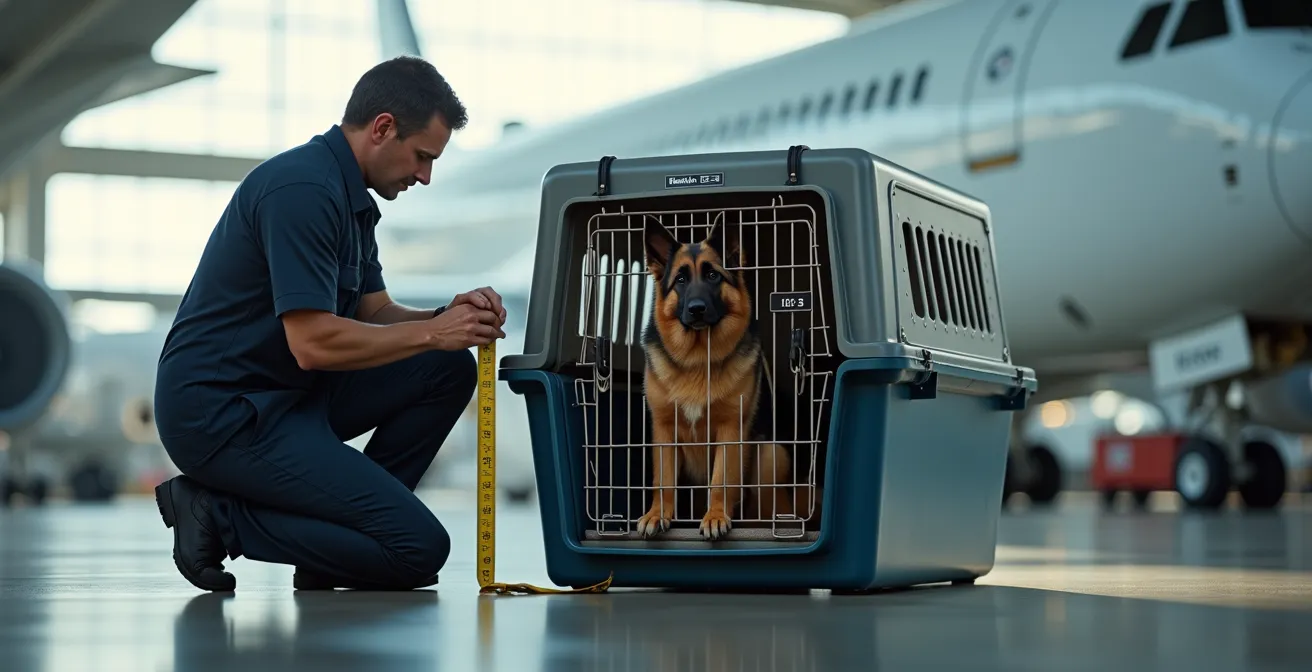
The most fundamental compliance checkpoint is the container’s size. An incorrect measurement is an immediate and non-negotiable point of failure. The IATA standard is not about general comfort; it is a precise formula designed to ensure the animal can stand, turn around, and lie down naturally without touching the sides or ceiling. This is critical for preventing injury and ensuring adequate air circulation. The “Ears to Roof” rule is a key part of this: the animal’s head or ear tips, whichever is higher, must not touch the crate’s ceiling while standing.
To determine the minimum required internal dimensions, you must use the official IATA formula:
- Length = Animal’s length from nose tip to tail base (A) + half its leg length from ground to elbow (0.5B).
- Width = The animal’s width at its widest point (C) x 2.
- Height = The animal’s height from floor to ear tip or top of head, whichever is higher (D) + bedding thickness.
Exceptions are critical. For example, specific airline requirements state that snub-nosed (brachycephalic) breeds like pugs or French bulldogs must be transported in a crate that is one size larger than their measurements would normally dictate. This provides additional air volume to mitigate their inherent respiratory risks. Furthermore, a crate can fit perfectly and still be rejected. In one reported case, a German Shepherd’s crate was denied because its ventilation holes were on both the top and bottom of the side panels, a design feature that violates IATA’s specific ventilation placement rules. This highlights that compliance is about adhering to every design detail, not just size.
Metal vs. Plastic Fasteners: Why Airlines Demand Metal Nuts?
A common point of rejection for many two-part rigid plastic containers is the hardware used to join the top and bottom halves. While many crates are sold with plastic clips or wing nuts, these are often a direct violation of IATA regulations. The standard demands superior structural integrity, which can only be guaranteed by metal nuts and bolts. Plastic fasteners are a known point of failure; they can become brittle in cold cargo holds, crack under the pressure changes at altitude, or break during rough handling.
When an auditor inspects a crate, they are verifying that it can withstand the rigors of air transport without risk of the animal escaping. A crate held together by plastic is an unacceptable risk. Industry standards now show that over 95% of commercial airlines strictly enforce the requirement for metal hardware. This is not an airline preference; it is a core safety protocol. Any crate that relies on plastic clips or twist locks as the primary method of securing the two halves will be rejected.
To avoid this common pitfall, travelers must often purchase a separate set of metal nuts and bolts to replace the manufacturer-provided plastic ones. Additionally, the door locking mechanism is another critical checkpoint. The pins must extend at least 1.6 cm (5/8 inch) beyond the horizontal extrusions above and below the door. Adding cable ties to the four corners of the door frame is also a required secondary security measure.
Hardware Compliance Checklist: Key Verification Points
- Verify that metal nuts and bolts are installed in every available fastener hole, not just a few.
- Confirm the door’s locking pins extend a minimum of 1.6 cm (5/8 inch) past the crate frame.
- Securely attach cable ties to all four corners of the crate door as a secondary locking system.
- Ensure no “twist” or “dial” locks are used as the primary fastening mechanism between the top and bottom shells.
- Check that no plastic clips or pegs are the sole fasteners holding the crate together.
Acclimation Timeline: How to Prep a Dog for 8 Hours in a Crate?
An animal’s behavior is a key factor in its safe transport. A highly stressed or anxious pet is at greater risk of injury and can pose a handling challenge. For this reason, IATA regulations are not just about the physical container, but also about the animal’s preparation. Crate acclimation is not a suggestion; it is an expected part of the pre-flight protocol. The goal is to ensure the animal views the crate as a safe, familiar space, which significantly reduces stress during the journey. IATA guidelines confirm that animals behave perfectly fine when they are accustomed to the kennel they are transported in.
A proper acclimation timeline should begin weeks, not days, before travel. The process must be gradual and positive:
- Weeks 4-3 Pre-Flight: Introduce the crate with the door open in a common area. Place treats, meals, and favorite toys inside to encourage voluntary entry.
- Weeks 2-1 Pre-Flight: Begin closing the door for short periods (a few minutes) while you are in the room, gradually increasing the duration.
- Final Week: Practice leaving the room for short intervals with the dog in the crate. Extend the time to simulate the duration of the flight, including an 8-hour overnight period if necessary.
This gradual process builds a positive association and mitigates the anxiety of confinement. On the day of travel, a strict feeding and exercise schedule is also part of the protocol. IATA recommends feeding a light meal and providing water up until travel time. In the United States, it is mandatory to feed the animal within 2 hours of departure. Exercising the pet immediately before it is placed in the container for check-in is also crucial for its well-being.
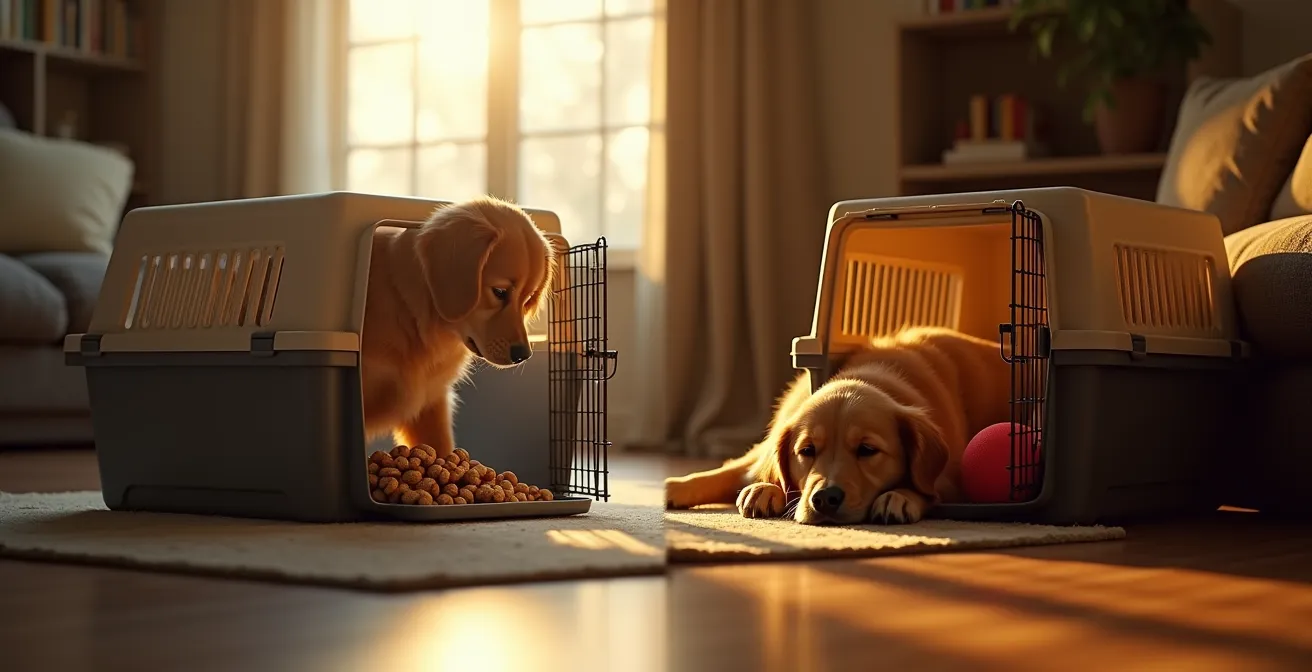
The visual progression from hesitation to comfort is the goal of any acclimation plan. By transforming the crate from a foreign object into a secure den, you are actively complying with the spirit of the IATA regulations, which prioritize stress reduction for safe travel.
Freezable Water Dishes: Preventing Spills During Turbulence
Hydration is a non-negotiable welfare requirement for animal transport. Every crate must be equipped with both a food and a water dish. However, the implementation is subject to strict regulatory scrutiny to prevent spillage and ensure accessibility. A simple bowl placed on the floor of the crate is a guaranteed failure. The dishes must be securely attached to the inside of the crate door and be refillable from the outside without opening the door. This allows airline staff to provide water during layovers without creating a security risk by unlatching the primary lock.
The most common compliance failure is spillage. Water spilled during loading, takeoff, or turbulence can soak the animal’s bedding, causing discomfort and distress. In a worst-case scenario, significant leakage can damage other cargo or aircraft systems. To mitigate this, the standard industry practice is to freeze the water in the bowl before the flight. The ice melts gradually, providing a slow, steady supply of water while preventing spillage during the most turbulent phases of transport. Airlines report this method is highly effective and has become a de facto requirement for flights longer than four hours.
To ensure full compliance, follow this installation protocol:
- Attach two separate, appropriately sized bowls for food and water to the inside of the wire door.
- Verify that both bowls can be accessed from the outside. Many compliant bowls have a spout or funnel system.
- Consider attaching small funnels with cable ties to the door near the bowls to make refilling by handlers even easier.
- Use a secure attachment method, such as sturdy clips or brackets, that will not dislodge if the crate is jostled.
- Fill the water bowl and freeze it solid several hours before leaving for the airport.
This system demonstrates to an auditor that you have considered both the animal’s need for hydration and the logistical realities of air cargo handling. It is a proactive measure that signals a high level of preparation.
Live Animal Stickers: Where to Place Them for Maximum Visibility?
Proper labeling of a pet container is a critical communication tool for airline handlers. It is not a decorative element; it is a vital part of the safety system. The IATA-standard “Live Animals” and “This Way Up” arrow stickers must be present and correctly placed. A sticker in the wrong position is functionally equivalent to no sticker at all. The primary directive is ensuring maximum visibility for handlers, who are often working quickly in varied lighting conditions.
The common failure point is placing labels only on one or two sides of the crate. The regulations are explicit: “Live Animals” labels must be affixed to all four sides of the container at a height that is easily visible to a standing or crouching handler. “This Way Up” arrows should be placed on all four vertical corners, precisely where a handler’s hands would naturally grip the crate to lift it. This intuitive placement ensures the crate’s orientation is always clear, preventing it from being loaded upside down or on its side.
To ensure your labeling is compliant and robust, an auditor will verify the following:
- Redundancy: Are there labels on all four sides? Using more than the minimum number of required stickers is encouraged.
- Placement: Are the labels at handler eye-level and are the arrows on the corners?
- Durability: Labels should be laminated with clear packing tape to protect them from moisture, humidity, and peeling during transit. A torn or illegible label is a compliance failure.
- Identification: A clear identification card with the pet’s name, your contact information, the flight number, and the final destination should be securely attached near the main “Live Animals” label.

The texture and material of the sticker and its protective layer are as important as its placement. A durable, well-adhered label demonstrates an understanding of the harsh environment of air cargo and is a key sign of a well-prepared shipper.
ISO 11784/11785: What If Your Microchip Isn’t Compatible in Europe?
A pet’s microchip is its primary form of identification during international travel, but not all microchips are created equal. A major point of failure, particularly for pets entering the European Union, is microchip incompatibility. The EU and many other regions have standardized on the ISO 11784/11785 frequency. If your pet has a non-ISO chip (often found in older pets or those microchipped in certain regions), it may be unreadable by the scanners used by destination authorities. From a regulatory perspective, an unreadable microchip is the same as no microchip at all.
This can lead to serious complications, including quarantine or denial of entry, at your expense. The responsibility for ensuring compatibility rests entirely with the traveler. You cannot assume your veterinarian’s scanner is the same as the one used by customs officials abroad. The European Union, for instance, has highly specific requirements for microchip identification that are detailed in its health certificates and vary depending on whether the pet is moving between member states or arriving from a third country.
To prevent this documentation failure, a verification protocol must be followed well in advance of travel:
- Verify the Standard: Confirm your pet’s microchip is an ISO 11784/11785 compliant, 15-digit chip. This information should be available from your veterinarian or the chip manufacturer.
- Carry a Scanner: If your pet has a non-ISO chip, you are required to travel with your own compatible scanner to present to officials upon arrival.
- Document Everything: The microchip number must be prominently and correctly recorded on all health certificates, import permits, and travel documents. A single incorrect digit can invalidate the entire document.
- Confirm with Authorities: Contact the destination country’s veterinary or import services to confirm their scanner capabilities and any specific requirements.
As a backup, it is also a non-negotiable standard that pets wear a collar with at least two pieces of identification affixed, showing the owner’s contact information and destination address.
How to Break the Cycle of Nighttime Accidents in Crate Training?
While often viewed as a housetraining issue, accidents inside the crate during travel are treated as a serious regulatory and sanitation problem. In the context of air transport, an accident is not a “mistake” but a potential biohazard and a symptom of extreme stress. IATA’s primary concern is that animals may become highly stressed when traveling, which can manifest in soiling the container. The issue is therefore framed as a failure in pre-flight preparation and stress management, not a failure in the dog’s training.
The solution is a strict pre-flight management protocol focused on minimizing the animal’s need to eliminate during the flight. This involves careful control of food and water intake, combined with strategic exercise. Following a regulated schedule is a mandatory component of preparing a pet for air travel.
To prevent accidents, the following schedule is required:
- 4 Hours Pre-Flight: Provide the final meal, which should be light. Begin to reduce water intake from this point forward.
- 2 Hours Pre-Flight: Offer a final, small drink of water. After this, no more water should be given until the animal is checked in.
- Immediately Before Check-in: Take the dog for a thorough walk and provide one last opportunity to relieve itself. This is the single most important step in preventing in-flight accidents.
Furthermore, the crate itself must be prepared to manage a potential accident. The bedding material must be absorbent. Many travelers use disposable puppy pads or specialized absorbent mats under a light blanket. This demonstrates to an auditor that you have a contingency plan in place, which is a key aspect of compliant shipping. An animal arriving in a soiled condition is a clear sign of distress and a failure to follow protocol.
Key Takeaways
- Hardware is Non-Negotiable: Plastic fasteners are an automatic failure. Only metal nuts and bolts provide the required structural integrity.
- Measurements are Absolute: The IATA sizing formula is not a guideline. Headroom and turning space are mandatory and precisely calculated.
- Documentation Must Be Flawless: The correct, valid document (Pet Passport vs. Health Certificate) for your specific route is as critical as the crate itself.
Pet Passport vs. Health Certificate: What Is the Difference?
One of the most complex areas of compliance is navigating the required health documentation. The terms “Pet Passport” and “Health Certificate” are often used interchangeably, but they are fundamentally different documents with distinct purposes, validities, and geographical applications. Presenting the wrong document at the check-in counter is as certain a cause for rejection as a faulty crate. The airline’s role is to enforce the entry requirements of the destination country, and if your paperwork is incorrect, they are obligated to deny boarding.
The primary distinction is geographical. The EU Pet Passport is a document designed for seamless travel *between* EU member states. For a pet residing in the EU, it is a lifetime document that is updated with rabies vaccination records. A Veterinary Health Certificate, however, is an international travel document required by most countries for entry. It is typically valid for a very short period—often just 10 days from the date of issue by an accredited veterinarian. For entry into the United States, this often takes the form of the APHIS 7001 form.
This comparative table clarifies the key differences:
| Document Type | Valid For | Required By | Validity Period |
|---|---|---|---|
| Pet Passport | Intra-EU travel | EU member states | Lifetime with updates |
| Health Certificate | International travel | Most countries including US | 10 days from issue |
| APHIS 7001 | Entry to US | USDA | 10 days |
| Import Permit | Specific destinations | Various countries | Varies by country |
Furthermore, these requirements are subject to change without notice based on global health situations. For instance, as a critical update, new CDC requirements took effect August 1, 2024, imposing additional rules for dogs entering the U.S., especially those arriving from countries considered high-risk for rabies. This underscores the need for travelers to verify the exact and most current documentation requirements for their specific itinerary directly with the destination country’s consulate or department of agriculture.
Do not assume your documentation is correct. Verify every requirement for your specific origin, transit, and destination points directly with the relevant government authorities well in advance of your travel date. A thorough documentation audit is your only protection against a last-minute regulatory failure.