
The critical distinction between a “Pet Passport” and an “Animal Health Certificate” is not the document’s name, but the regulatory system it represents; one is a multi-entry EU ledger, while the other is a single-entry endorsement for most other countries.
- Successful international pet travel depends on understanding the sequence and timing of veterinary procedures, not just the final paperwork.
- Key steps like microchipping, rabies vaccination, and specific parasite treatments are governed by strict, non-negotiable timelines.
Recommendation: Shift your focus from the document’s title to mastering the procedural timeline required by your destination country to avoid common and costly errors.
For any international traveler with a companion animal, the stack of required paperwork can feel like an impenetrable wall of bureaucracy. Terms like “Pet Passport” and “Animal Health Certificate” are often used interchangeably, leading to a dangerous assumption that they are simply different names for the same thing. This misunderstanding is the root cause of countless travel denials, last-minute panics, and unexpected quarantine costs. While both documents serve to prove an animal’s fitness for travel, they are fundamentally different in their application, validity, and the regulatory logic that underpins them.
The common advice is to “get the right form,” but this overlooks the most critical element: procedural integrity. The validity of any travel document is not based on the paper itself, but on the successful completion of a series of time-sensitive veterinary events, each one validating the next. A rabies vaccination administered before a microchip is implanted, for example, is invalid. An endorsement signature from the wrong authority renders the entire document void. The key to navigating this process is not to obsess over the document’s name, but to understand the unyielding chronological and jurisdictional logic that each country’s biosecurity agency enforces.
This guide abandons the simplistic “passport vs. certificate” debate. Instead, it provides a precise, procedural breakdown of the critical checkpoints in the international pet travel process. We will dissect the regulatory logic behind each requirement, from vaccination waiting periods to digital endorsements, clarifying the specific rules that govern travel to or from regions like the European Union, the United Kingdom, and the United States. Understanding this framework is the only way to transform bureaucratic confusion into a clear, actionable plan.
This article provides a clear, sequential breakdown of the most critical and often misunderstood regulations in international pet travel. The following sections detail the specific timelines, technical standards, and procedural rules you must follow to ensure compliance.
Contents: A Procedural Guide to Pet Travel Compliance
- The 21-Day Waiting Period: Why You Can’t Travel Immediately After Vaccination?
- ISO 11784/11785: What If Your Microchip Isn’t Compatible in Europe?
- The 120-Hour Rule: Timing the Echinococcus Treatment for UK Entry
- Digital vs. Ink Signature: Navigating the USDA APHIS Portal
- Traveling With a “Bully” Breed: Which Countries Ban Entry?
- Live Animal Stickers: Where to Place Them for Maximum Visibility?
- The Heartworm Risk Gap: What Happens If You Miss a Month?
- Is Your Indoor Cat Really Safe From Seasonal Parasites?
The 21-Day Waiting Period: Why You Can’t Travel Immediately After Vaccination?
One of the most rigid and misunderstood rules in international pet travel is the mandatory waiting period following a primary rabies vaccination. A pet is not eligible for entry into the EU and many other countries until at least 21 days have passed since its primary rabies shot. This is not an arbitrary administrative delay; it is based on firm veterinary science. The 21-day period represents the minimum time required for a mammal’s immune system to mount a sufficient antibody response to the vaccine, ensuring the animal is genuinely protected against and cannot transmit the rabies virus. Traveling before this period is complete means the animal is not considered legally immunized, resulting in immediate travel refusal or quarantine upon arrival.
This rule applies specifically to a “primary” vaccination. This includes a pet’s first-ever rabies vaccine or a vaccine administered after a lapse in coverage. If a pet receives a booster shot while its previous vaccination is still valid (i.e., continuous coverage), there is typically no waiting period. However, proving this continuous coverage requires meticulous record-keeping. Any ambiguity in the veterinary records will cause officials to treat the vaccination as primary, triggering the 21-day wait. It is crucial to understand that the waiting period begins the day after the vaccination is administered; the vaccination day is considered “Day 0.”
As this table from U.S. export guidance illustrates, the waiting period is a fundamental requirement linked to the type of vaccination administered.
| Vaccine Type | Waiting Period | Valid For | Notes |
|---|---|---|---|
| Primary vaccination (all brands) | 21-30 days | 1 year | First vaccination after microchip |
| Booster (continuous coverage) | Immediate | 1-3 years | No wait if no lapse in coverage |
| Booster (after lapse) | 21-30 days | 1 year | Treated as primary vaccination |
To ensure full compliance, a systematic audit of your travel timeline is not just recommended; it is essential for procedural integrity.
Action Plan: Timeline Calculation Checklist for Pet Travel
- Mark vaccination date as Day 0 on your calendar and confirm the veterinarian recorded it accurately.
- Count forward 21 full days (or 30 for certain jurisdictions) to determine the first possible date of travel.
- Schedule the final health certificate appointment within the strict 10-day window before your departure date.
- Verify and document any booster exemptions if a previous vaccination is still valid, ensuring no lapse in coverage.
- Cross-reference the destination country’s specific import requirements for any extended waiting periods beyond the standard 21 days.
ISO 11784/11785: What If Your Microchip Isn’t Compatible in Europe?
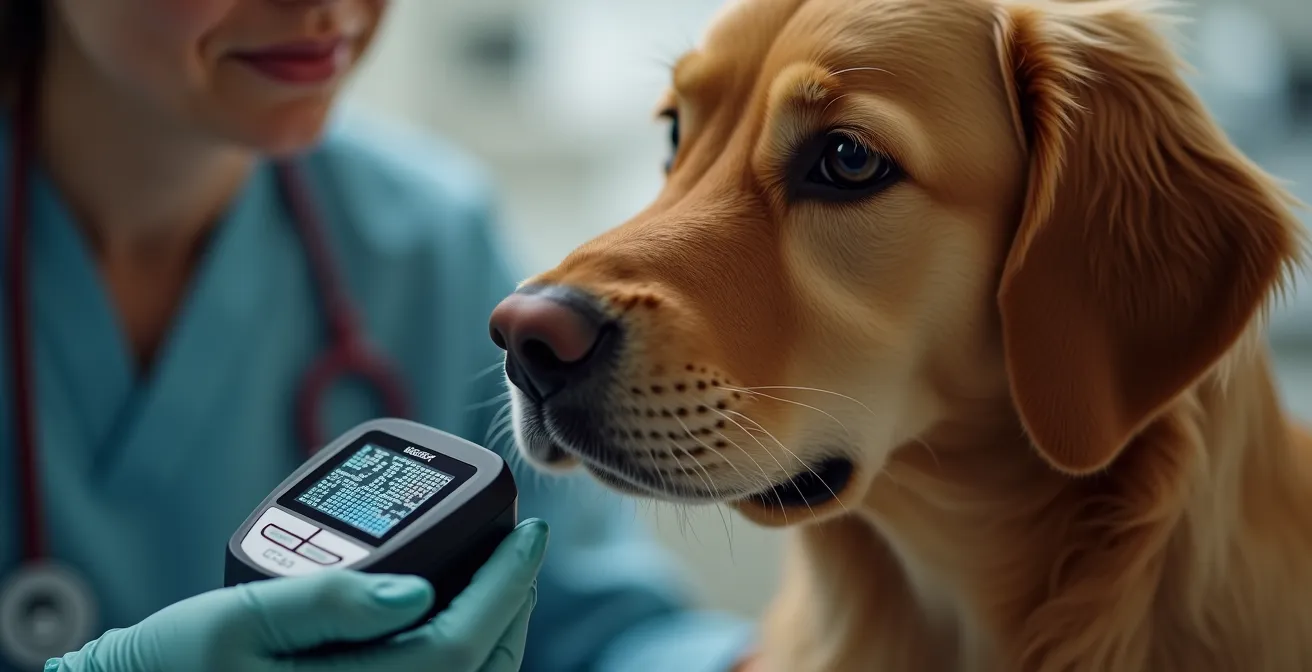
Before any vaccine is administered or any form is signed, the entire international travel process begins with one foundational step: the microchip. A pet must be identifiable by an ISO-compliant microchip for any subsequent veterinary procedures to be considered valid. The European Union and many other regions mandate that all imported pets have a microchip conforming to ISO standards 11784 and 11785. These standards dictate the chip’s radio frequency (134.2 kHz) and its 15-digit numeric structure, ensuring it can be read by standard scanners used by border officials worldwide. A non-compliant chip is functionally equivalent to no chip at all.
The reason for this strict requirement is procedural integrity. The microchip serves as the pet’s unique, unalterable passport number. The veterinarian scans the chip, records the number, and then performs the vaccination. This sequence officially links that specific vaccination to that specific animal. If a pet has a non-ISO chip (e.g., a 9- or 10-digit chip operating at 125 kHz, common in some older US-based systems), EU scanners will not be able to read it. In this scenario, the traveler has two options: either carry their own compatible scanner to present to officials or have a veterinarian implant a new, compliant ISO chip. If a new chip is implanted, the entire vaccination process must restart, as any shots given before the new chip are invalid for travel.
The consequences of a non-compliant chip are not theoretical. As confirmed by international pet transport regulations, 100% of pets entering the EU, UK, Australia, and New Zealand must have ISO 11784/11785 compliant microchips. The following case illustrates the procedural cascade failure caused by an incompatible chip.
Case Study: Non-ISO Microchip Travel Experience
An adopted rescue dog from San Diego, prepared for travel to the EU, was found to have a 9-digit microchip operating at 125 kHz. This chip could not be read by the international-standard 134.2 kHz scanners required for EU entry. Consequently, the dog’s existing rabies vaccination was deemed invalid for travel purposes. The owner had to have a new, ISO-compliant chip implanted and then re-vaccinate the dog for rabies, triggering a new 21-day waiting period and significantly delaying the planned travel.
The 120-Hour Rule: Timing the Echinococcus Treatment for UK Entry
For travelers with dogs heading to the United Kingdom (and a few other countries like Ireland, Finland, and Malta), an additional, time-sensitive requirement comes into play: the tapeworm treatment. Specifically, dogs must be treated for Echinococcus multilocularis tapeworm by a licensed veterinarian. This is not a simple check-box item; it is governed by a strict time window. The treatment must be administered no less than 24 hours and no more than 120 hours (5 days) before the scheduled time of arrival in the UK. This precision is a matter of biosecurity, designed to ensure that any potential tapeworms are eliminated shortly before the dog enters the country, minimizing public and animal health risks.
The veterinarian must record the exact date and time of treatment, as well as the specific product used, directly on the Animal Health Certificate. Any deviation from the 24-to-120-hour window will result in the dog being refused entry or placed into quarantine at the owner’s expense. The 24-120 hour window is mandatory for all dogs entering the UK, making accurate calculation a non-negotiable part of the travel process. This requires working backward from your arrival time, not forward from your departure.
Mistakes in time zone conversion or miscalculation of the 5-day window are common and costly. A meticulous approach to scheduling is paramount. The following steps provide a clear protocol for ensuring compliance with this critical rule.
- Note the exact date and scheduled time of your dog’s arrival in the UK (e.g., Tuesday at 14:00 GMT).
- Work backward exactly 120 hours (5 days) to find the latest possible treatment time (e.g., the preceding Thursday at 14:00 GMT).
- Work backward exactly 24 hours (1 day) to find the earliest possible treatment time (e.g., the preceding Monday at 14:00 GMT).
- Ensure your veterinarian’s appointment is scheduled squarely within this window, accounting for the local time zone where the treatment occurs.
- Verify that the veterinarian records the treatment time down to the minute on the official health certificate.
- Retain receipts or veterinary records that show the exact administration timestamp as a backup.
Digital vs. Ink Signature: Navigating the USDA APHIS Portal
For pet owners exporting an animal from the United States, the final step in the paperwork journey is the official government endorsement. After your USDA-accredited veterinarian completes the Animal Health Certificate, it must be signed and stamped (endorsed) by the USDA’s Animal and Plant Health Inspection Service (APHIS). Historically, this required physically mailing or hand-delivering the documents to a USDA office, a process fraught with stress and potential delays. Today, the system has evolved, introducing a critical choice between a traditional “wet ink” signature and a more modern digital endorsement.
The primary tool for this is the Veterinary Export Health Certification System (VEHCS), an online portal. An accredited veterinarian can scan and upload the completed health certificate and all supporting documents directly to VEHCS. The system allows for digital submission, review, and endorsement by the USDA. Once endorsed, the veterinarian can print the official, digitally signed document. This process eliminates the risk of overnight shipping delays and provides a secure, traceable method for obtaining the necessary government validation.
However, not all countries accept digitally signed documents. Some jurisdictions still require a traditional ink stamp and signature from the USDA office on the original paper certificate. It is the traveler’s absolute responsibility to verify the destination country’s requirements. Choosing the digital route for a country that demands a wet-ink signature will result in an invalid document and a denied entry. This decision represents a key jurisdictional nuance that must be confirmed directly with the import authorities of the destination country or through the official USDA APHIS pet travel website before submitting any documents.
Case Study: VEHCS Digital System Implementation
The USDA APHIS Veterinary Export Health Certification System (VEHCS) was developed to streamline the complex endorsement process. It allows accredited veterinarians to submit health certificate documents online. This can dramatically speed up the endorsement timeline from days to, in some cases, hours. For travelers on a tight 10-day health certificate window, using VEHCS to avoid the stress and uncertainty of overnight shipping has become a critical logistical advantage, provided the destination country accepts digital signatures.
Traveling With a “Bully” Breed: Which Countries Ban Entry?
Beyond the universal veterinary requirements of vaccinations and parasite treatments, some travelers face an additional hurdle: Breed-Specific Legislation (BSL). Numerous countries, including the UK, France, Germany, and Denmark, have laws that restrict or outright ban the import of certain dog breeds, often referred to as “bully breeds.” These typically include breeds like the American Pit Bull Terrier, Staffordshire Bull Terrier, and Japanese Tosa, as well as any dog whose physical appearance resembles these breeds, even if it’s a mixed breed. This layer of regulation is entirely separate from health and biosecurity; it is a matter of public policy and law.
For owners of these breeds or their mixes, travel may be impossible. For others, it requires an extensive portfolio of documentation to prove the dog is not a banned type. This is especially challenging for rescue dogs of unknown parentage. Simply having a veterinarian list “Mixed Breed” on the health certificate is often insufficient. Officials at the border will make a visual assessment, and if the dog appears to fit the description of a banned breed, it can be refused entry or, in the worst-case scenario, seized. Therefore, owners must proactively build a case to prove their dog’s lineage or temperament.

Assembling a robust documentation package is the only viable strategy. This goes far beyond the standard health certificate. The goal is to provide irrefutable evidence to counter a subjective visual assessment by a border agent. The following table, based on common requirements seen in guidance for proving breed status, outlines the types of documents that can be crucial.
| Documentation Type | Purpose | Requirements |
|---|---|---|
| Breed Assessment Letter | Prove mixed breed status | Licensed vet attestation with physical description |
| DNA Test Results | Genetic breed verification | Certified lab results showing breed percentages |
| Photo Documentation | Visual breed assessment | Multiple angles from puppyhood to present |
| Behavioral Certification | Temperament verification | Professional trainer or vet behavioral assessment |
Live Animal Stickers: Where to Place Them for Maximum Visibility?
While document accuracy is paramount, the physical safety and welfare of your pet during transit depend heavily on clear, unambiguous communication with airline handlers. This is achieved through the strategic placement of specific labels on the travel carrier. IATA (International Air Transport Association) regulations provide a standardized system of stickers to ensure that a carrier containing a live animal is handled correctly at all times. Proper placement is not a matter of aesthetics; it is a functional requirement for the animal’s safety.
The “Live Animal” sticker is the most critical. It should be prominently displayed, often in bright green, to immediately signal the nature of the cargo. Equally important are the “This Way Up” or “Arrow” stickers, which indicate the carrier’s correct orientation to prevent it from being tipped or loaded sideways. These stickers must be placed on all visible sides of the carrier so they cannot be missed, regardless of how the crate is positioned on a luggage cart or in a cargo hold. Insufficient or poorly placed labeling can lead to mishandling, causing extreme stress or injury to the animal.
Modern best practices go beyond the basic IATA requirements. Including a photo of the pet, its name, and your direct contact information can be invaluable if the animal and its paperwork are somehow separated. A more recent innovation is the use of QR codes. A QR code sticker on the carrier can link to a digital folder containing all the pet’s travel documents, veterinary history, and emergency contacts, providing handlers with instant access to critical information. The goal of this external labeling protocol is to create a redundant, highly visible system that protects the animal when it is out of your sight.
For maximum effectiveness, follow this strategic placement guide:
- Place large “Live Animal” stickers on the top and at least two opposing sides of the carrier.
- Position “This Way Up” arrow stickers on all four vertical sides to ensure correct orientation is always visible.
- Attach a pouch near the carrier door containing feeding and watering schedules and your 24-hour contact information.
- Include a clear photo of your pet along with its name on both the top and sides of the carrier.
- Consider adding a QR code linking to a digital file with copies of the health certificate, vaccination records, and emergency contacts.
- Apply strips of reflective tape around the edges of the stickers to increase visibility in dimly lit cargo holds.
The Heartworm Risk Gap: What Happens If You Miss a Month?
Parasite prevention is a standard part of responsible pet ownership, but it takes on heightened importance during international travel. A common question arises regarding heartworm prevention: what are the consequences of missing a monthly dose? A lapse in prevention, even for a single month, creates a “risk gap” where a pet can become infected by a bite from a single infected mosquito. This is particularly dangerous when traveling from a low-risk or non-endemic area (like a cold northern climate) to a region where heartworm is prevalent (like the southern United States or Mediterranean Europe).
If a dose is missed, you cannot simply restart the medication. The protocol, as followed by veterinarians, is one of safety and caution. Administering a standard heartworm preventative to a dog that is already infected can cause a severe, potentially fatal reaction as the medication kills off a large number of microfilariae (larval worms) in the bloodstream at once. Therefore, before resuming prevention, a veterinarian must perform a heartworm test to confirm the dog is negative. This test itself has a waiting period; it can take up to six months after exposure for an infection to become detectable.
This creates a complex procedural issue for a traveling pet. If you miss a dose during your travels in a high-risk area, your veterinarian upon return will likely recommend a heartworm test. You may need to wait several months and re-test before safely resuming a preventative schedule. During this period, the pet remains vulnerable. The only correct protocol is to maintain a strict, unbroken schedule of prevention, meticulously documented in your pet’s records, especially when crossing into different climate zones where parasite risks change dramatically.
Key Takeaways
- Procedural Integrity First: The validity of any travel document hinges on the correct sequence and timing of veterinary actions, not the document’s name.
- Timelines Are Non-Negotiable: The 21-day rabies wait, the 120-hour tapeworm window, and other deadlines are strictly enforced biosecurity measures.
- Jurisdiction Is Paramount: Regulations for microchips, breed restrictions, and final endorsements vary dramatically between countries; verification is the traveler’s responsibility.
Is Your Indoor Cat Really Safe From Seasonal Parasites?
A pervasive myth among pet owners is that an “indoor-only” cat is shielded from external parasites like fleas, ticks, and worms. While the risk is certainly lower than for an outdoor animal, it is far from zero. During international travel, this risk multiplies exponentially. An indoor cat is removed from its controlled home environment and exposed to a series of high-traffic, non-sterile locations, including airport terminals, security screening areas, cargo holds, and transport vehicles. Each of these locations presents a potential vector for parasite transmission.
Fleas can hitch a ride on luggage or clothing, ticks can be present in grassy areas just outside an airport terminal, and mosquitos carrying heartworm can easily enter a transport van. The carrier itself can become contaminated during security checks or in a cargo hold shared with other animals. The belief that an indoor cat requires no parasite prevention for travel is a dangerous oversight. Many countries require a recent, veterinarian-administered flea and tick treatment as a condition of entry, regardless of the pet’s living situation. This is a biosecurity measure to prevent the importation of pests.
For the animal’s own welfare, a pre-travel preventative treatment is a critical line of defense. A post-travel veterinary check-up is also a prudent measure to ensure no unwelcome guests were picked up along the way. The responsible protocol is to treat an indoor cat as if it were an outdoor cat for the entire duration of the travel process, from the moment it leaves home until it is safely settled in the new destination.
To protect your indoor cat during travel, adhere to the following protocol:
- Apply a veterinarian-approved flea, tick, and heartworm preventative treatment before departure.
- Thoroughly inspect the pet and its carrier for any signs of parasites after each stage of the journey, especially after airport security.
- Upon returning home, keep travel gear like the carrier and bedding isolated for at least 48 hours before cleaning and storing.
- Schedule a post-travel veterinary examination within two weeks of arrival to perform a wellness and parasite check.
- Monitor your cat closely for 30 days for any unusual scratching, lethargy, or changes in behavior.
- If you travel frequently, discuss a year-round parasite prevention plan with your veterinarian, even for an indoor cat.
To ensure full compliance and a seamless journey for your companion animal, the next logical step is to consult with a USDA-accredited veterinarian. They can help you create a formal, country-specific travel timeline that integrates every one of these critical procedural requirements.
Frequently Asked Questions About Parasites and Pet Travel
What if I miss a heartworm dose during international travel?
Your veterinarian must be consulted immediately. They will likely need to perform a heartworm disease test before resuming preventative medication. This is because administering medication to an already infected animal can cause severe adverse reactions. The test itself may need to be repeated months later to confirm a negative status.
Do I need to adjust prevention for different climate zones?
Yes, absolutely. Moving from a low-risk area, such as a cold climate, to a high-risk region with warm, humid weather requires a veterinary consultation. Your vet may recommend adjusting the type or frequency of medication to provide adequate protection against the new set of local parasites.
Can I restart prevention immediately after a gap?
No. Standard veterinary protocol dictates that a heartworm test must be conducted before resuming preventative medication after a lapse in coverage. This crucial safety step prevents a potentially life-threatening reaction that can occur if a currently infected animal is given a standard preventative dose.